Purpose:
This guide walks you through setting up and managing your Stream Store in StreamElements, where viewers spend their Loyalty Points on redeemable rewards — Stream Perks, Sound Effects, Access-Code Lists, and Text-to-Speech — to boost engagement.
Table of Contents
- Accessing the Stream Store
- Stream Store Options
- Types of Stream Store Items
- Item Settings
- Setting Up Sound Effects
- Setting Up Stream Perks
- Setting Up Text-to-Speech (TTS)
- Setting Up an Access-Code List
- Common Setup: Redemption Command & Overlay Widget
- Navigating Your Public Profile
- Additional Resources
Accessing the Stream Store
In your StreamElements dashboard, go to the 'Loyalty' section in the left menu and select 'Stream Store'.
You can create a variety of redemption items — sound effects, short clips, access codes, or any other creative item you can think of. Consult your community for ideas to increase engagement and entertainment value.
Stream Store Options
Filter Items: filter items by type to manage your store efficiently.

Open Store: takes you to your public store page. Items appear here if their settings allow viewer redemption. Logged-in viewers can see their current points and the channel's loyalty settings.
Redemptions: view a list of previously redeemed items, approve or decline redemptions based on your settings, search by item name/username/details, and access the 'Redemption History' table to review past redemptions from up to a year ago.
Create New Item: adds a new item to your store.
Types of Stream Store Items
- Stream Perks: commonly used for short clips played on viewer demand.
- Sound Effects: designed to play sounds, often used to disrupt intense in-game moments.
- Access-Code List: maintains a list of pre-purchased access codes for viewers to redeem.
Item Settings
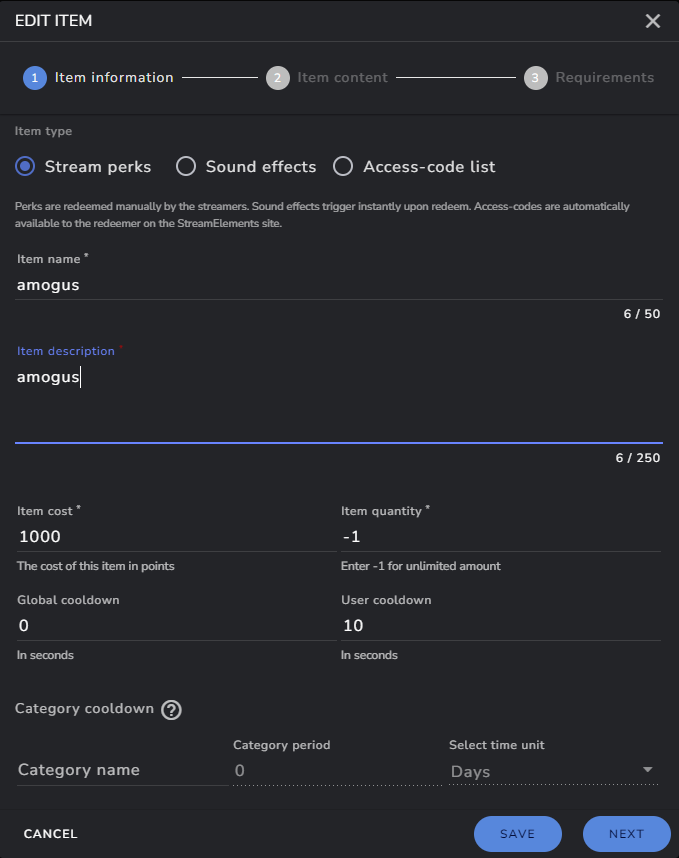
Each item type shares some settings and has some individual ones, spread across three pages when you create or edit an item:
1. Item Information Page
Settings common to all item types:
- Item Name: the name of the item.
- Description: a brief description of the item.
- Cost: the number of loyalty points required for redemption.
- Quantity: the available quantity of the item.
- Global and User Cooldowns: time restrictions for how often the item can be redeemed globally and per user.
- Category Cooldown: time restrictions for how often items in the same category can be redeemed (leave empty if you're not using categories).
2. Item Content Page
Settings differ based on the item type — see the type-specific sections below.
3. Requirements Page
Consistent across all item types. Lets you request additional information from viewers before they can redeem the item — this becomes visible on your 'Redemptions' page once provided.
Setting Up Sound Effects
Rewarding your community with unique sound effects they can trigger with their Loyalty points is a great way to boost engagement.
- On the Item Content page, select item type 'Sound effects'.
- Upload your sound file (preferably MP3) and set the desired volume.
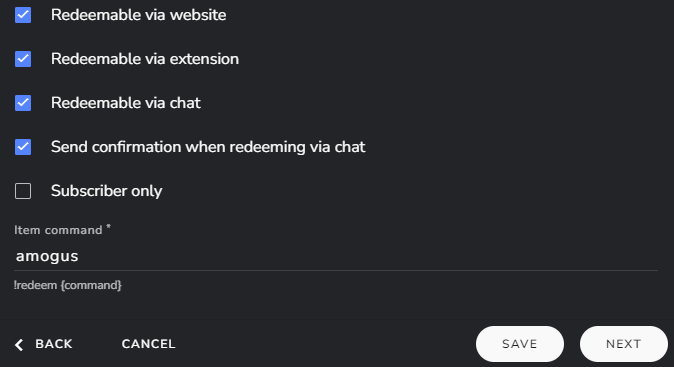
- Enable redemption options and name the command for the item.
Then set up the command and overlay widget as described in Common Setup below.
Setting Up Stream Perks
- On the Item Content page, select item type 'Stream Perk'.


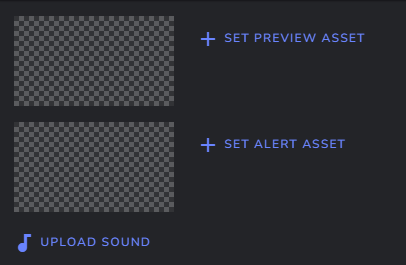
- Click 'CHANGE ALERT ASSET' and choose your video from the library.
Important notes:
- Video Preview: if not visible, try exporting the video in a different format — for .mp4 files, H.264 is recommended over HEVC (H.265). The preview indicates a successful upload.
- Audio Handling: if a sound file is uploaded, it overrides the audio in the video file. No need to upload a separate sound if the video already has audio.
-
Text-to-Speech (TTS): to let users add a text message to the alert, include the
${1:}variable in the command so the entire message is read out — see Setting Up Text-to-Speech below. Standard tipping moderation rules apply. - Thumbnail: the "Preview asset" is just a thumbnail shown in your stream store — it doesn't affect the redeemed alert on screen.
Then set up the command and overlay widget as described in Common Setup below.
Setting Up Text-to-Speech (TTS)
TTS uses a Stream Perk item, so start by creating one as described above, then:
- When creating the command (see Common Setup), use
${redeem tts ${1:}}as the response to include the entire message typed after the command (e.g.!tts Hello my name is Bob). - In the Store Redemption widget's settings, enable Text-to-Speech and select your preferred TTS voice.
Setting Up an Access-Code List

- Entering Access Codes: enter your access codes into the designated field, one per line.
- Alert Configuration: optionally set an alert that triggers when a code is redeemed.
- Distribution Settings: decide whether codes can be redeemed multiple times, and choose random or sequential dispensation.
- Uploading Requirements: you must enter at least one code before you can proceed to the next step.
Common Setup: Redemption Command & Overlay Widget
Once your item's content is configured (sound file, video, TTS variable, or access codes), the remaining steps are the same for every item type:
1. Create the Redemption Command
- Go to your custom commands page.
- Create a command with a name of your choosing.
- Set the response to
${redeem item_name_here}(or${redeem item_name${1:}}if viewers can add a message, e.g. for TTS or Stream Perks).
The item name and item command don't need to match exactly, but using the same name helps you remember it. Example:
- Item Name:
ez4ence - Item Command:
ez4ence - Custom Command Name:
!ez4ence - Custom Command Response:
${redeem ez4ence}
When a viewer types !ez4ence in chat, the item redeems.
2. Add the Store Redemption Widget
- Navigate to My Overlays.
- Create a new overlay or edit an existing one.
- In the overlay editor, add the Store Redemption widget.

- Remove the default video, sound, and text from the widget, since you only want your item's asset to play on redemption.

- Save the overlay.
3. Test and Go Live
-
Test the command: with OBS or the Overlay Editor open, trigger the command in chat (add a message after it if applicable, e.g.
!ez4ence Hello my name is Bob) to confirm it plays correctly. If the overlay is new, add it as a browser source in OBS — for an existing overlay, just save your changes. - Enable/Disable: keep the command enabled for both online and offline testing initially. Once confirmed, set it to work only when you're live.
- Optional: hide the command from your public Stream Store if you don't want it listed.
Navigating Your Public Profile
When accessing your StreamElements public profile via 'Open Store' or directly at streamelements.com/YourUsername, you and your viewers will see navigation options at the top right:

- Overview Page: a Twitch player and chat for your channel — a snapshot of your live stream.
- Tip Page: your StreamElements tipping page, where viewers can support your stream with tips.
- Stream Store: where viewers browse and redeem the items you've set up.
- Media Request Page: the current queue of requested songs.
- Public Commands Page: commands you've made available to viewers.
- Leaderboards: top supporters or viewers based on engagement metrics.
- Chatstats Page: statistics and trends about viewer chat activity.
- Theme Selection: toggle between light and dark mode.