Purpose:
SE.Live is StreamElements' free OBS Studio plugin. It brings your Activity Feed, chat, media requests, and stream setup tools directly into OBS, and lets you stream to multiple platforms at once. This guide covers everything you need to know: installing SE.Live, connecting your accounts, its core features, setting up your overlay, multistreaming, common questions, and uninstalling it if you ever need to. For fixes to specific errors or problems, see our dedicated SE.Live Troubleshooting article.
Table of Contents
- Requirements
- Installing SE.Live
- Connecting Your Streaming Account
- Core Features
- Setting Up Your Overlay
- Multistreaming
- FAQs
- Uninstalling SE.Live
- Additional Resources
Requirements
- OBS v31.x or newer
- Windows only — SE.Live is currently supported on Windows operating systems. Support for SE.Live on Mac has been discontinued.
Installing SE.Live
- Download SE.Live: Go to streamelements.com/selive and download the installer. You'll also be prompted to download it during the StreamElements setup wizard.
- Run the installer: Make sure OBS Studio is closed before installing, to avoid conflicts. Choose your install folder and click Next.
-
Open OBS Studio: After installation, launch OBS (run it as Administrator). You should see a StreamElements menu at the top of the OBS window.
- Log in: If this is your first time using SE.Live, a Login Screen will appear. Select the platform you use to log in to StreamElements (e.g. Twitch or YouTube) and complete the authorization process.
Connecting Your Streaming Account
Once SE.Live is installed, connect your streaming platform and StreamElements account:
-
Configure your stream settings:
- In OBS Studio, go to Settings > Stream.
- Choose your streaming service (e.g. Twitch).
- Click Connect Account and complete the authorization process.
- Once authorized, you can close the platform's docks or reposition them. Access them later via View > Docks.
-
Log in to StreamElements:
- In OBS, go to StreamElements in the top menu and select Login.
- Log in with your StreamElements account and authorize the integration. The chat and Activity Feed docks will open automatically — you can reopen them later via StreamElements menu > SE.Live docks > Chat / Activity Feed / Media Request.
- Finish initial setup: if prompted to complete setup again inside SE.Live, follow the on-screen instructions, then choose 'Do it later' and 'Leave' to dismiss the prompt.
Use OBS's Profiles and Scene Collection features to save your dock layout and streaming settings (including connected accounts and stream keys). If you switch profiles, log out of StreamElements first (StreamElements > Logout) and log back in with the correct account.

The StreamElements menu in OBS gives you quick access to:
- Stream Setup: Configure stream details and settings.
- Edit Widgets Data: Manage and customize widgets directly from SE.Live.
- Setup Bot & Tipping: Access initial setup for chat bot and tipping features.
- Browse Overlays: Navigate to your overlays section in the StreamElements dashboard.
- SE.Live Docks: Toggle the Activity Feed, Chat, or Media Request docks.
- Import: Import settings from another service.
- SE.Live Versions: Switch between stable or latest versions of SE.Live.
- Cloud Backup / Manage Cloud Backup: Back up or restore your settings and content (see below).
- Check for Updates: Verify if a newer SE.Live version is available.
- Help: Report issues or join the StreamElements Discord via Live Chat.
- Logout: Log out of SE.Live.

Streaming to YouTube
(YouTube-specific steps below adapted from a community guide by Chase.)
-
Connect your YouTube account to SE.Live to integrate it with StreamElements.

-
Add your audio and video sources:
- Click the + icon on the sources menu, select "Audio input capture," select your audio device, and click "OK".
- Repeat with "Video input capture" to add your camera.

-
Add your YouTube stream key (required to go live):
- Click Settings (in the controls tab, or under File in the upper menu) and select "Stream".
- From the service menu, select "YouTube/YouTube gaming".
- Paste your stream key. You can find it via "Get stream key" next to the stream key field, or under youtube.com/live_dashboard under "Encoder setup". Never share your stream key!

-
Add a YouTube overlay:
- Go to the Themes Gallery, select the "THEME" tab, then the "YOUTUBE THEME" (choose the static option for best CPU performance).
- Click "create" and name your overlay, then click "see theme in my overlays".
- Edit the overlay: select "AlertBox", open its "settings" tab, and deselect all checkboxes except SuperChat. Hide the countdown once it's finished by clicking the "eye" icon near the Countdown, Starting soon, and Frame layers.
- To add the overlay to SE.Live: copy its URL (from inside the overlay or the Themes Gallery), create a new browser source in SE.Live via the + icon under "Scenes", paste the URL, set the resolution to 1920x1080, check "Shutdown when source not visible", and click OK.

-
Add the StreamElements chatbot as a moderator:
- Start onboarding and copy the StreamElements Chatbot URL.
- Open your YouTube dashboard > Settings > Community, then paste and approve the Chatbot URL.

You're all set to go live!
Core Features
Activity Feed: Adds the StreamElements Activity Feed to OBS.
Elements Control Center: Easily add widgets from the Elements gallery or your own library.
Media Request: Control your media request queue directly from OBS.
Multi-Chat: Consolidate chat messages from multiple streaming platforms into a single, unified chat window.
Cloud Backup: Back up your OBS profiles and scene collections to your StreamElements account.
- Go to StreamElements > Cloud Backup > Backup Settings and Content.
- Enter a name for the backup, select the profiles and scene collections you want to save, and click Backup.
- To restore, go to StreamElements > Cloud Backup > Manage Cloud Backups.
- Locate the backup and click "Open".
- Select the profiles and scene collections you want to restore and click "Restore". OBS will restart once restoration is complete.
- Note: total backup size can't exceed 100MB, so avoid including large files like videos — save those locally instead.
Setting Up Your Overlay
Once you're logged in, here's how to get your overlay ready before you go live.
Testing Your Overlay
- Verify it: Type in your chat to confirm it appears correctly in your OBS/overlay setup.
- Create scenes: Decide how many scenes you need (e.g. 'In Game', 'BRB', 'Stream Starting', 'Just Chatting') and customize each one's layout.
- Use widgets ('Labels'): Many creators display recent activity — donations, subscribers, etc. — using 'Labels' widgets, combining visual assets with on-screen text.
Getting Started with Overlays
- Access your overlay: go to your StreamElements dashboard > My Overlays, locate the overlay created during initial setup, and click Edit.
- Add widgets: experiment with adding widgets in the overlay editor. Enable Live Preview to see changes in real time, and save once you're happy with it.
- Set up a browser source: copy the overlay URL from the address bar (don't expose this to viewers), then in SE.Live create a Browser Source and paste the URL in.

Note on Overlay URL Security
- The overlay URL contains sensitive information — avoid exposing it to viewers or sharing it publicly.
- Be cautious editing your overlay in the StreamElements editor, since the URL appears in the address bar.

Organizing Overlays
- Create separate overlays for different elements, like visual assets and alert boxes — for example, a dedicated overlay just for follower alerts.
- The order of layers in OBS affects visibility on stream, so position overlay browser sources to achieve the hierarchy you want, and place alerts on top so they're never obscured.
Using the Themes Gallery
- Select a theme and supplementary widgets from the StreamElements Themes Gallery to match your stream's style.
- Explore different themes and their variations ("Super Themes") to find a cohesive look, and customize alerts and widgets to engage your audience.
Implementation Tips
- Theme selection: pick a theme that aligns with your stream's branding and content style.
- Alert management: assign alerts to dedicated overlays for better control and visibility.
- Visual cohesion: make sure all overlays and widgets blend with your stream's overall theme.
Multistreaming
SE.Live Multistreaming lets you stream simultaneously to every platform connected to your StreamElements account — including Twitch, YouTube, TikTok, Kick, X (Twitter), Trovo, and any Custom RTMP destination — plus create a vertical canvas for YouTube. It's completely free, runs locally on your machine with no external service connections, and is optimized to avoid placing excessive demand on your CPU or GPU. There's no limit to how many platforms you can stream to, as long as your PC and internet connection can handle it.
Note: X (Twitter) support is not yet fully operational — we're prioritizing it. Follow our social channels for the latest updates.
Recommended Specs
- For best performance, use a system built from 2019 onward.
- Account for the combined bitrate across all platforms: if your main output bitrate is 6000 and you're streaming to three platforms, your system and connection need to handle a total of 18,000 (6000 × 3).
Setting Up Outputs
An "Output" is a platform you want to stream to. Each platform you want to include (Twitch, YouTube, TikTok, etc.) needs to be configured as an Output via the Multistreaming Panel in the bottom-right corner of SE.Live.
- Open the Multistreaming Panel: shows all platforms linked to your StreamElements account.
- Configure your outputs: toggle the switch next to a platform's name to enable it. You'll see the channel name and which Canvas it uses.
-
Advanced settings: click the three-dot menu and select Settings to open Outputs, Canvas Settings, and Broadcast Settings.
-
Configure outputs: click Connect to link platforms that aren't connected yet, and choose which OBS audio track to send to each platform.
-
Set broadcast settings: pre-define your stream title, category, and platform-specific options (e.g. YouTube privacy status).
Going Live
-
Start streaming: click Start Streaming. A window will pop up asking you to set or confirm the title and category for each enabled platform.
- Confirm and go live: after setting titles and categories, click Start Streaming again to begin broadcasting.
- Check your live status: look for the Live indicator next to each platform in the Multistreaming panel to confirm you're streaming on each one.
- View all chats in one place: open MultiChat from the StreamElements menu to see chats from every connected platform in one window.
TIP! You can start or stop streaming to individual platforms without stopping the others — just toggle the output off in the Multistreaming dock.
Streaming to TikTok
- The TikTok output is always visible in your Multistreaming panel.
- Even without TikTok LIVE access yet, logging into your TikTok account here fast-tracks your review process with TikTok.
- Once you're logged in and granted TikTok LIVE access, the TikTok output switches to On and you're ready to go live there too.
FAQs
Q: What happens if I have issues with OBS and SE.Live?
A: Check our dedicated SE.Live Troubleshooting article, which covers solutions to common issues.
Q: Where are my TikTok chat and events?
A: TikTok hasn't yet provided the APIs needed for us to support it in the Activity Feed and Multi-Chat. Events currently appear in your chat dock, but alerts aren't available yet — TikTok streamers can open the stand-alone TikTok Chat dock in SE.Live from the StreamElements menu. We'll roll out full support once TikTok grants full API access.
Q: Why is there a TikTok output I can't delete?
A: A TikTok output is added by default to promote easy login and a faster review process — connect your account and try it out. It's temporary and won't stay there permanently.
Q: How many platforms can I stream to simultaneously?
A: As many as your PC and internet connection can handle — you're not limited to just one or two.
Q: Can I add more than one output for the same platform?
A: Yes — for example, one for horizontal and one for vertical streaming on YouTube. In fact, YouTube automatically gets two outputs per connected channel, since it supports simultaneous horizontal and vertical streams.
Q: Can I have multiple streams on TikTok?
A: Yes, but you'll need to add the second stream as a Custom RTMP output.
Q: Do I have to link my stream key each time I open OBS?
A: No, SE.Live remembers your account and connects automatically.
Q: Can I set custom resolutions, bitrates, or audio channels for each platform?
A: Yes to all three. Set up a separate canvas per platform for custom resolutions (a one-time setup), configure custom bitrates per platform or canvas, and set audio channels per output in the output settings screen.
Q: Can I create multiple vertical or horizontal canvases, and link them together?
A: Yes — create as many as you need, and yes, canvases can be linked together. Keep in mind the more canvases and outputs you have active, the more system resources are used.
Uninstalling SE.Live
If you need to remove the SE.Live plugin:
-
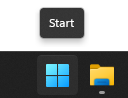
Open the Windows Start Menu (bottom-left of the taskbar, or press the Windows key).

-
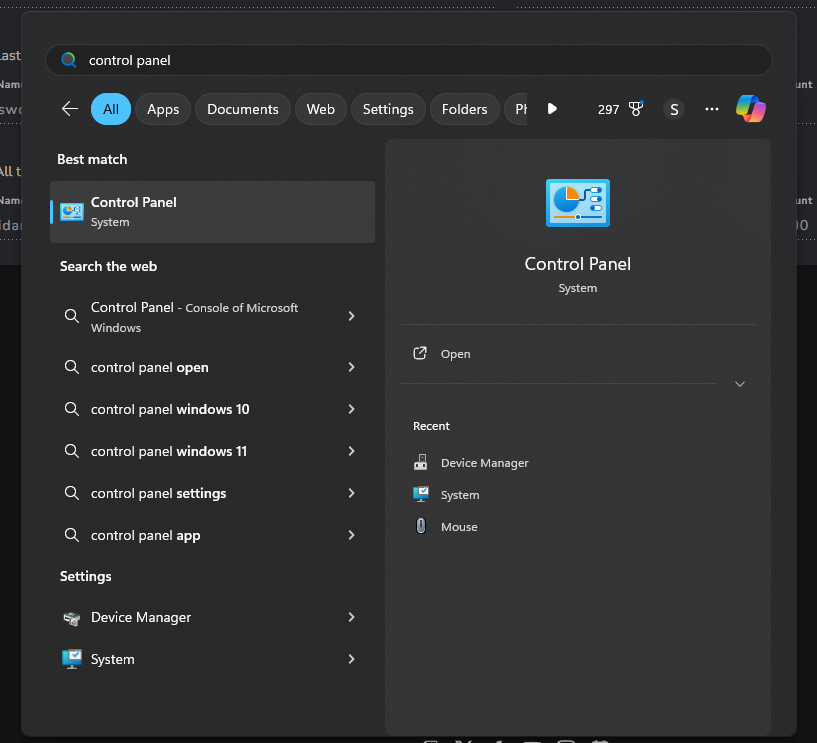
Search for "Control Panel".
- Access Programs: in "Large Icon" view, open "Programs and Features"; in "Category View", open "Uninstall a Program" under "Programs".
-
Find and select SE.Live: locate "Streamelements SE.Live" in the list and click it to reveal the "Uninstall" option.
- Uninstall: click "Uninstall" and follow the prompts. Rebooting your PC afterward is highly recommended.

Optional: Back Up Your Profile First
- Open File Explorer.
- Navigate to your OBS profile directory: enter
%appdata%\obs-studio\basicin the address bar. - Copy both folders to another location.
After reinstalling or uninstalling, restore your profile by pasting the backed-up folders back into the original directory. If you run into an error while uninstalling, see our SE.Live Troubleshooting article.